


2020 has been quite the year. I think we’re all breathing a collective sigh of relief that we’re quickly approaching 2021, but despite the year’s ups and downs, we’ve made some incredible strides in the way we work. Since companies went remote in March, we’ve reevaluated how, when, where, and why we work. And Hive has changed alongside all of you. Did you know that we helped teams complete over 10,000,000 actions in 2020 alone?
That’s why we’re here to give you a year-in-review, taking you step-by-step through some of the biggest changes we made in 2020 to help you and your remote team work faster, better and more efficiently.
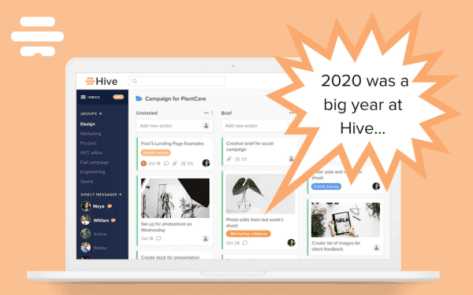
Hive 2.0
Perhaps the biggest change we made this year was the launch of Hive 2.0, which included a newly designed action card and an updated navigation system inside Hive.
New Navigation

The new layout was focused on the left-hand side panel, which had everything from My Actions to Apps and Projects. This panel became your new all-in-one source for all things inside Hive.
My Actions view is now anchored on the top left of your Navigation sidebar. This will take you to your to-do list, which lists every task that has been assigned to you with due dates.
We’ve also made it easy to customize your Navigation panel. To unpin Hive apps from the panel, click on Apps, then use the pins on the tiles to unpin or pin to the panel. You can access these apps from the Apps section anytime. Additionally, we’ve also moved pinned projects and Summary Views over to the left-hand panel. Pin as many projects as you’d like, and access them quickly from the Navigation.
To pin a project to the left-hand side panel, select the “pin” icon next to the project name. If the pin is blue, your project will show up on the panel. If you want to remove a project from the panel, click on the pin icon again.

To find a list of all your team’s projects, archived projects, templates, and summary views, click on Projects, formerly known as Project Navigator. For Hive Messengers, we’ve made a few changes to messaging. Messaging is also included in this new panel. We’ve moved user Status under your profile menu on the top right.
To edit the height of your messaging panel to see either more of your projects or more of your messages, drag the bar between Groups and pinned projects up or down. To quickly start a conversation, click on the “New Message” button, and add your teammates to the chat, or use shortcut Command/Control+K.
You’ll also be able to hide Group or Direct messages by pressing the X on the right side of the row. If a new message is sent, it will come back to the panel.
Updated Action Card

In addition to our new Navigation panel, we’ve unveiled a new Action Card format. We’ve refreshed the layout to make it easier to quickly gather the most important details for each to-do. Now you’ll be able to see the assignee, status and due date easily on the right-hand side. We’ve also made it easier to quickly share, delete or archive cards, which you can do with the four icons on the bottom left of the panel.
To mark your card as urgent, access action templates, or convert your action, head over to the more menu at the top of the card. And you can quickly share, delete, or archive, or copy your action from the bottom right of the card.
Following the card means you will get notifications in your activity feed for things like comments, status updates, and date changes. Assignees will automatically become followers, and you can also the comments section on the bottom left of the card to collaborate with your teammates. When you @mention someone, they will automatically be added as a follower.
To see a history of your card, click on show history at the bottom left of the card.
As the year went on, we also made a few more action card changes…
- Ability to edit text in action card – We added the ability to change text color, highlight, create bullets, and bold, underline and italicize text
- Ability to assign action to team
- Card will carry over dependencies on action card when it is copied
- There are now recurring subactions in action cards
- We’ve added important action reminders – The ability to set a reminder for your most important actions
- New dependencies formatting in action cards – Color-coded dependencies with new icons
- Ability to convert actions to subaction
- Card actions are autocompleted once subactions are completed
- Ability to add followers to action cards without @mentioning them on card
Mobile App Updates

In 2020 we made tons of updates to the Hive Mobile app, which included:
- Mobile search
- Mobile Kanban board
- Status on mobile
- Ability to view action card history on mobile
- Ability to share documents from mobile app
- Quick-share action cards from mobile app
- Ability to search for groups in mobile chat
- Single sign on available on mobile app
Over the next few months, we’ll be unveiling new mobile updates, including the ability to add priority levels on mobile, an update to mobile notifications, and mobile Notes that you can access on-the-go. Stay tuned!
Portfolio View

Portfolio View in Hive is a much loved view for small and large teams around the world. Why? It’s the all-in-one place to see the detail of Project Navigator combined with the flexibility of a Table View. Portfolio View is best leveraged when looking at multiple projects that have the same action cards and/or custom fields because you can then compare those projects accurately and efficiently.
Note: Portfolio View is a Hive App – read about how to toggle them on & pin them here.
Throughout 2020, as teams have moved remote and organizations needed greater insight into overarching project and task trends, we’ve made the following updates to Portfolio View:
- Create, save and share portfolio views – With our new updates, users can create, save, and share multiple Portfolio Views, monitoring and managing projects from a macro-level perspective
- Portfolio View color statuses – The red, grey, yellow and red dots help clarify specific project progress with a glance, great for teams working at a rapid pace
- Show % complete in Portfolio View – You can now see project % completed in portfolio view, which will correspond to project completion percentage on your project homepage
- Edit status inline in Portfolio View – You can now edit a project status while in Portfolio View. To utilize this new feature, simply double click on the status column in Portfolio View
Hive Notes

There probably hasn’t been a more relevant time for Hive Notes to take off than in 2020. People all over the world used and loved Hive Notes to help them stay focused and connected during meetings.
In case you missed all of our Notes updates, here are a few highlights:
- You can now utilize Hive Notes formatting functionality to clearly list out action items and talking points to help your meetings run smoothly
- You can now add multiple entries in one note to correspond with a recurring meeting
- Ability to have multiple notes open on desktop
- Ability to assign action items to teammates with a few clicks, or link an existing action
- Reorder action items in notes with a simple drag and drop motion
- There’s now a private section on each note – The text you input in this section will only be visible to you
Focus Mode
Another thing we heard from you? Lots of you were hard at work on projects and tasks from home, but felt like the notifications from your device were distracting you. That’s why we created Focus Mode. With Focus Mode, you can shut off all notifications and effectively mute the app.
To toggle on Focus Mode, visit the Hive App store by clicking “Apps” at the top of the left-hand panel. You can find Focus Mode in the “My Apps” section of the app store.
Once Focus Mode has been enabled, you can simply drag and drop tasks from “My Actions” into the “My Focus” section at the top of the screen.
This is what your Hive screen will look like once you enter Focus Mode:

In Focus Mode, all notifications and chats are muted which allows you to focus on a single action card. Open the card in Focus Mode by clicking ‘Open action card’ in the bottom left. You can complete the card by clicking ‘Complete action’ or by completing from the open action card as normal. Exit Focus Mode and start receiving notifications again by clicking ‘Exit’!
Priority Levels for Action Cards

Throughout 2020, we also started tracking all feature requests via Canny, to help us better understand what we needed to add to Hive to enhance your remote work experience. One of the most requested features on our Feature Request page was the ability to set priority on action cards, and we’re excited to announce that it’s here – thank you for using your voice, Hive Community!
With priority levels on your action cards, you can now:
- See a priority level indicator on the outside of cards in any project’s card layout – aka, Status, Team or Label View
- Create a customized priority list – including colors! (Is your team more Low, Medium, High? Or perhaps P1, P2, P3, P4? – it’s your choice!)
- Sort action cards by Priority level in your project’s card layouts
How to get started: Toggle on the Hive App
Step 1: Toggle on Card priorities in Hive Apps. Note: A workspace Admin must enable this!
Step 2: Check out your new feature: open any action card to see the defaults: High, Medium and Low as shown in the screenshot below. If that works for you, you’re all set! If you’d like to customize, continue reading to the next section.
Customize your Priorities
We recommend starting by using the edit option to change the name & color of the 3 existing priorities, and adding a fourth or more using the “Add a new priority level’ option. Click the Edit pencil when hovering over the priority to get started:
You can customize:
- Name
- Level (when you sort, 1 will be at the top)
- Color
View & Sort your Priorities:

Card Layouts
From a card layout, click Filters and then in the Sort By drop-down, choose Priority Level. The cards will be ordered with Level 1 at the top, descending from there.
Priority Levels & Urgency
When sorted by Priority Level, if you have an action card marked as Urgent, the Urgent card will be ranked at the top, even if its Priority Level is lower than another card. After the Urgent card, the rest of the cards will be listed by their Priority Level (and cannot be re-ordered differently).
Proofing and Approvals

We were excited to bring everyone a brand new version of our proofing tool. Starting with visual changes, we moved comments to the right hand side, with the pages on the left. In the editing panel at the top of your screen, you’ll find the following:
- View
- Annotate – You’ll be able to highlight, strike-through, underline, add a callout type annotation, and more.
- Shapes – Add shapes to your proof.
- Insert – Insert a stamp or add a file attachment by clicking the paperclip icon. You can directly download any attached files by clicking an inserted paperclip icon and selecting the “Download” option.
- Measure
- Edit
You’re also now able to switch on a “light” or “dark” mode to change the background color of the proofing tool, which will be sticky to your last setting. You can flip between them by clicking the toggle in the upper right hand corner, and selecting your desired mode from the dropdown.
Additionally, when you’re looking at comments, each comment will be highlighted when you select it, and you can view the comment status by clicking on the blurb box in the upper right corner of the comment. The comment status will also be marked by visual icons, which will make it much easier to scan through and survey what has been approved.
A few other updates we made to proofing throughout 2020:
- Show proof on action card – Ability to see proof directly from action card on mobile device
- Automatically start new approval round if all didn’t approve
- Added easily trackable annotations
- Ability to initiate status change after approval is completed
- Sorting and filtering options that allow you to sort by Position, Time, Status, Author, Type
- Scroll users to @mention on proofing when tagged
- Upload editing comments made in Adobe in Hive
Dying for some more Hive updates? Here are a few other things we did in 2020:
Timesheet reporting
Want to see exactly where your billable hours have been allocated by project? Meet Timesheet Reporting, ideal for agencies and organizations who need to cleanly categorize time spent. Managers, projects owners, and workspace admins can see time from approved timesheets. This allows you to get a bird’s eye view of individuals’ time and project spending.
Note: If a timesheet is pending approval or rejected, the hours will not be incorporated into Timesheet Reporting.
Gantt Updates
Gantt is a big fan favorite. Throughout 2020 we made some additions to Gantt’s functionality. You can now:
- Share Gantt view via URL with external parties
- Easily edit action tiles in Gantt
- Enter equations for lead and lag time in Gantt
- Sort Gantt actions chronologically from left to right with new “Cascade sort” button
Email signature formatting
- Click on your profile image in the upper right hand corner of your Hive window
- Select “Your profile” and click “Mail”
- Add your custom email signature in the available text box and press “Save”
Be on the lookout for more features coming from Hive in the next three months. If you want to request a feature, you can do so on Canny here!


